

Last updated: November 17, 2026
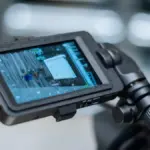
A non-destructive verification inspection is the right way to check spray foam removal in blind roof voids, eaves, and spandrel pockets when hand access stops at the face of the cavity. It combines a FLIR thermal imaging camera with an articulating optical borescope so a surveyor can see where foam remains, where a cold bridging anomaly shows up, and where a hidden void still needs opening.
Key takeaways
- Thermal imaging shows temperature patterns, not the foam itself, so it works best as a map for what to inspect next.
- A borescope is the tool that confirms what the camera suggests inside an eaves void, spandrel wall, or boxed rafter pocket.
- The strongest result comes from pairing both tools in the same inspection, not using one as a stand-alone answer.
- This method is useful when visual access is blocked, but it is not the right tool for judging timber condition or moisture damage.
- A good inspection records location, view angle, and image context so the findings can be checked later.
What is a non-destructive verification inspection?
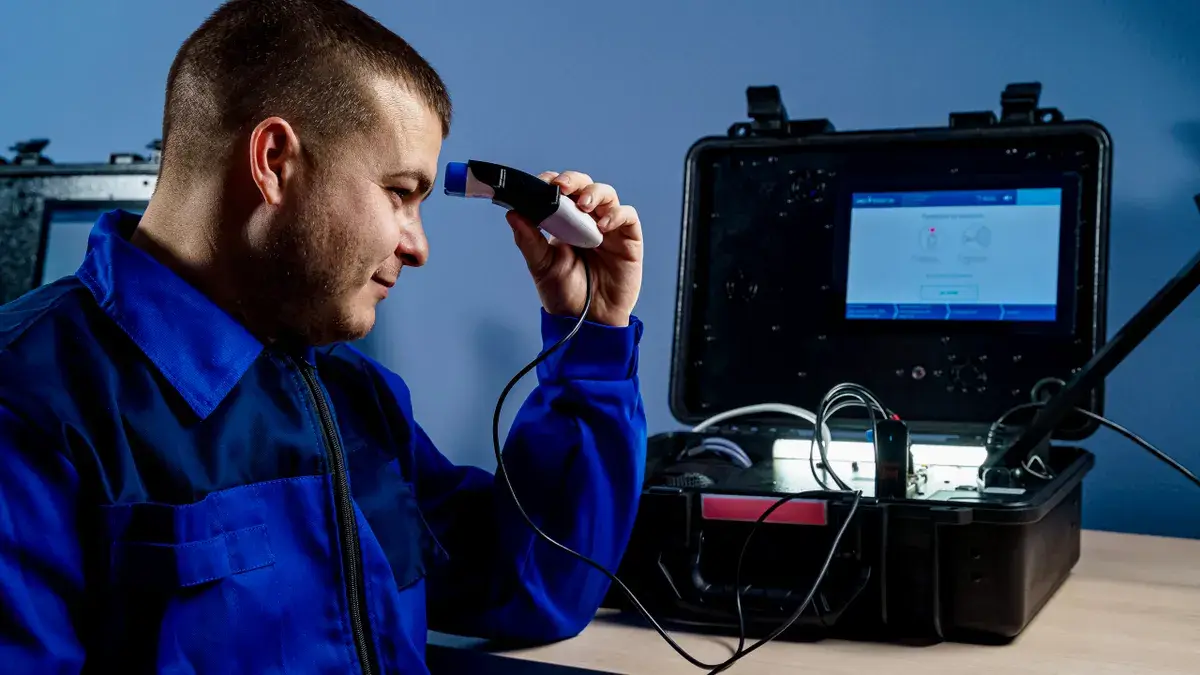
A non-destructive verification inspection is a check that uses thermal imaging and endoscopic access to confirm whether spray foam has been removed from hidden cavities without cutting large new openings. It is built for spaces such as blind rafter pockets, boxed eaves, and spandrel wall cavities where a direct line of sight does not exist.
The job is simple in theory and careful in practice: use the FLIR thermal imaging camera to spot temperature patterns that suggest leftover foam, then use the articulating optical borescope to look directly into the cavity through a small access point. That pairing matters because infrared thermography can show a cold bridging anomaly, but it cannot tell you whether the cause is foam residue, a gap in insulation, or another material change. The borescope adds the visual proof.
This page is about the inspection method, not a removal service and not timber diagnosis. It also is not a moisture report. If the problem is deciding whether a cavity still contains spray foam after work has been carried out, this is the right lens. If the question is rot, damp, or structural decay, that belongs on another page.
For method standards and inspection discipline, the RICS site and ASTM International are useful reference points for survey practice and non-destructive testing language:
- RICS: https://www.rics.org/
- ASTM International: https://www.astm.org/
How is the inspection set up?
The inspection is set up by creating one controlled thermal pass and one controlled borescope pass, then matching the two records by location. The goal is to keep the camera, the access point, and the cavity position aligned so the same spot can be compared twice, once by heat pattern and once by direct view.
Start with a brief external and internal scan of the target area. In loft work, that usually means the roof line, eaves, and any boxed sections where the roof structure closes off the void. In wall work, the target may be a spandrel wall or another hidden cavity behind finishes. The thermal camera should be used first because it can cover broad surfaces quickly and can point to a zone that deserves a closer look.
The borescope comes second. A small access hole or existing opening gives the lens a way into the cavity, and the articulating head helps turn around rafters, battens, or corners. The point is not to inspect every inch; it is to confirm the exact zone that the thermal image flagged. A 2-stage method like this saves time and reduces guesswork.
A useful setup also includes simple controls: keep the same side of the roof or wall in frame, note the cavity depth, and keep the image source and borescope view tied to a single label. A report that says “north eaves pocket, 1 access point, 2 image sets” is far more useful than a loose bundle of pictures.
How does thermal imaging find hidden foam residue?
Thermal imaging finds hidden foam residue by showing temperature differences that do not match the surrounding construction. Spray foam, leftover sealant, voids, and exposed timber all respond differently to heat flow, so a FLIR thermal imaging camera can show a patch, line, or strip that stands out from the surrounding roof or wall surface.
This is especially useful in infrared thermography loft survey work where the cavity is closed and the eye cannot follow the line of the rafter. If foam has been left in a blind section, the surface above it may warm or cool at a different rate from the adjacent area. That difference is the clue, not the conclusion. It may indicate hidden foam residue, but it may also reflect a pipe, a metal fixing, a change in substrate, or a gap in insulation.
The useful habit is to think in zones rather than single pixels. A narrow cold line along a rafter may suggest a thermal anomaly detection rafters issue. A patchy block in a corner may point to a remnant in an eaves return. A strong contrast around a boxed edge can justify a borescope check into the void behind it. The thermal image gives the map; the borescope gives the answer.
A thermal pass also helps reduce unnecessary opening. If the whole roof face reads evenly and only one boxed corner behaves differently, the inspection can stay focused. If the image shows several separate anomalies, the borescope work can be planned in the right order instead of making random access points.
How does a surveyor use a borescope behind rafter insulation?
A surveyor uses a borescope behind rafter insulation by placing the lens through a small access point, steering the tip around obstructions, and recording the cavity face, not just the nearest surface. The key is to get beyond the first layer of insulation and inspect the hidden line of the rafter bay.
The practical sequence is straightforward:
- Mark the cavity that the thermal image flagged, such as an **eaves void** or the edge of a **spandrel wall**. The aim is to keep the inspection tied to one location, not a general area.
- Open the smallest practical access point or use an existing gap. A 6 mm to 10 mm opening is often the sort of scale used for endoscopic access, but the exact size depends on the tool and the construction.
- Insert the **articulating optical borescope** and adjust the head slowly. The point is to see around the timber line, not to force the lens against the insulation.
- Scan the cavity face, the underside of rafters, and the corners where foam can bridge behind framing. A clean cavity should show the expected structure without residue blocking the void.
- Capture stills or short clips with the access point, direction, and cavity position identified in the frame. That lets the result be checked later without guessing where the image came from.
A borescope is strongest where the space is narrow and blind. It is weaker where the lens fogs, where the cavity is too long for clear orientation, or where the access hole is badly placed. That is why it should follow thermal imaging, not replace it. Used on its own, it can miss the one area you meant to inspect. Used after a thermal scan, it becomes precise.
Thermal camera or borescope: which one tells you more?
The borescope tells you more about what is physically present, while the thermal camera tells you more about where to look first. They answer different questions, and putting one in the wrong job is the fastest way to get a vague result.
| Tool | Best use | Main strength | Main limit |
|---|---|---|---|
| FLIR thermal imaging camera | Broad scan of roof or wall surfaces | Shows temperature patterns over a wide area | Cannot prove that foam residue is present |
| Articulating optical borescope | Direct view into a cavity | Confirms what is inside the void | Only sees what the lens can reach |
| Both together | Verification inspection in blind spaces | One finds the anomaly, the other confirms it | Needs careful matching of images and locations |
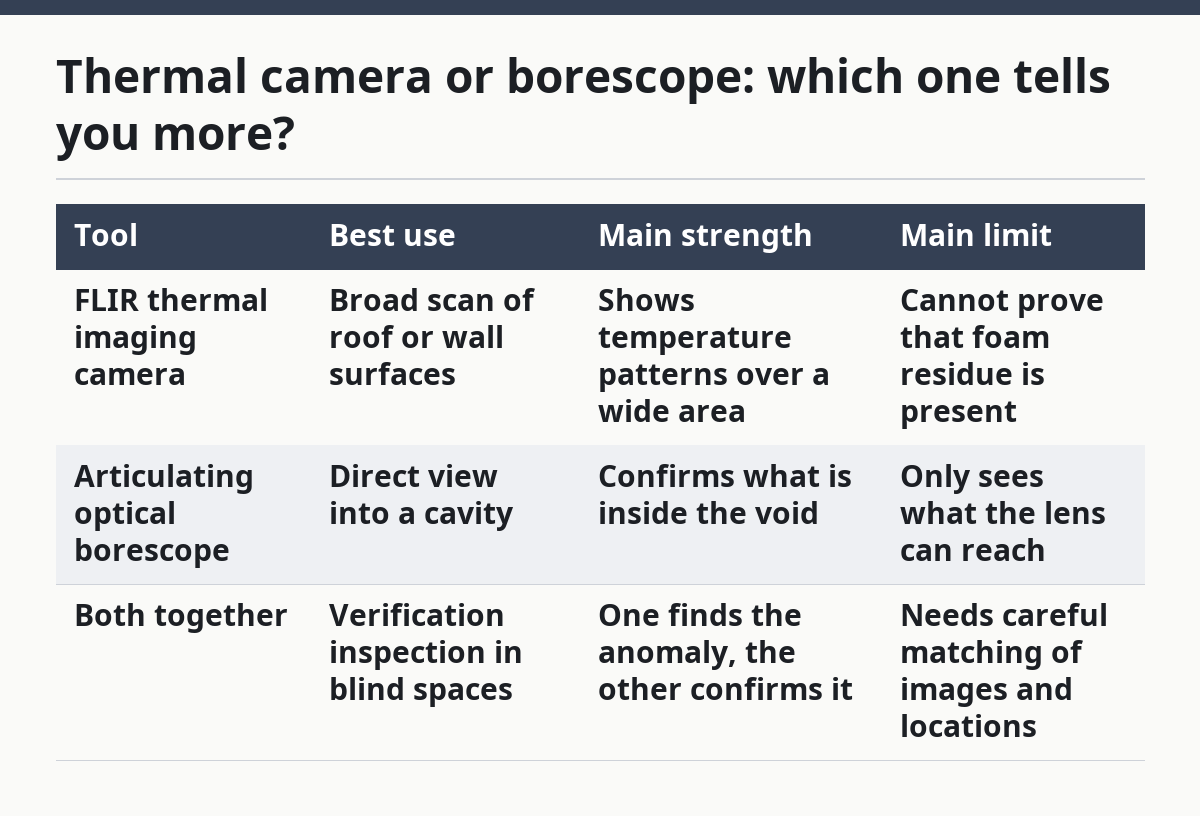
For borescope cavity roof inspection, the borescope is usually the final proof tool. For infrared thermography loft survey, the thermal camera is usually the first pass. The strong approach is to use both in sequence, not to argue that one can do the whole job. A thermal pass without endoscopy can leave doubt. A borescope pass without thermal guidance can waste time and still miss the relevant bay.
This is also where the limits matter. If the surface is thermally noisy because of sunlight, wind, or mixed materials, the camera may point in the wrong direction. If the cavity has sharp bends, heavy dust, or tight obstructions, the borescope may not show the full depth. That is not failure; it is the nature of the tools.
What mistakes ruin the result?
The biggest mistake is treating a thermal image as final proof. It is not final proof because a cold bridging anomaly can come from more than one cause, and a single image never tells the full story. If the inspection stops there, the report can sound certain while still being incomplete.
Another mistake is using the borescope without a plan. A lens pushed into the wrong rafter pocket may show only the first surface, not the hidden foam residue farther in. That costs time and can leave the important area uninspected. A third mistake is failing to label the images. Without location notes, a photo of a void means very little on its own.
There is also a trade-off in access. The smaller the opening, the less disturbance to the building, but the harder it may be to steer the camera. The larger the opening, the easier the view, but the more repair work follows. That is why the access point should be chosen to fit the question being asked, not the tool being used.
This method is wrong for someone who wants a moisture diagnosis, a timber decay assessment, or a cleaning report. It can support those jobs, but it does not replace them. It is also not the right choice if the cavity is already open enough for direct visual inspection, because the extra equipment would add little value.
What should a useful report show?
A useful report shows the cavity, the finding, and the reason the finding matters, all tied to the same spot. It should not read like a pile of image files. It should read like a chain: thermal clue, borescope confirmation, location, and conclusion.
At minimum, the record should note the element inspected, such as a loft rafter bay, an eaves void, or a spandrel wall. It should also show the tool used, the access point, and whether the image is thermal or endoscopic. A simple caption like “north eaves, thermal anomaly at rafter line, borescope shows residue in blind pocket” is more useful than a general note that says “inspection carried out.”
The best reports are careful about language. They say “appears consistent with hidden foam residue” if the evidence supports that reading, and they say “not visible in the inspected zone” when the lens does not reach the full cavity. That honesty matters because the inspection is a verification step, not a promise that every hidden space has been seen in one pass.
This is the point where the broader survey process comes in. If the subject is part of a larger building assessment, the inspection should sit inside the wider standards used for survey work. That is why the hub on chartered surveyor inspection protocols sits above this page. This page stays focused on one job: using thermal and endoscopic tools to verify what is inside blind roof and wall cavities.
Does thermal imaging detect spray foam moisture traps?
Thermal imaging can suggest a moisture trap, but it cannot prove one. A cooler patch or odd surface pattern may point to trapped moisture, missing insulation, or another hidden condition, so the image alone is not enough for a firm call.
How does a surveyor use a borescope behind rafter insulation?
A surveyor feeds the borescope through a small access point, turns the articulating head toward the cavity face, and checks the timber line, insulation edge, and corners. The aim is to see behind the rafter insulation without opening the whole bay.
Does thermal imaging confirm complete spray foam removal?
No, thermal imaging does not confirm complete spray foam removal on its own. It can show temperature patterns that suggest a cavity is still obstructed or uneven, but the borescope is the tool that confirms whether residue remains in the void.
Drafted with AI; not yet reviewed by a person.


One comment on “Endoscopic and Thermal Verification for Spray Foam”