







Last updated: November 14, 2026
Key Takeaways
- Distinguish moisture damage, insect attack, or structural warning before the next storm.
- Timber decay usually shows texture change; structural movement usually shows geometry change.
- Timber pathology in roofs is often caused by water, not age alone.
- A roof diagnostic check looks at geometry, support, connections, timber condition, and overload signs.
If your timber roof is showing stains, sag, cracking, or soft spots, you need to know whether the wood is decaying, overloaded, or simply tired. The answer is that roof pathology is a cause check, and structural diagnostics are the load check. The article Timber Pathology and Structural Roof Diagnostics — The Complete Guide sets out how to tell rot from movement, when to inspect, and what makes a roof unsafe. The topic matters because a roof can look unchanged for years, then move after one wet season.
What timber pathology and roof diagnostics actually cover
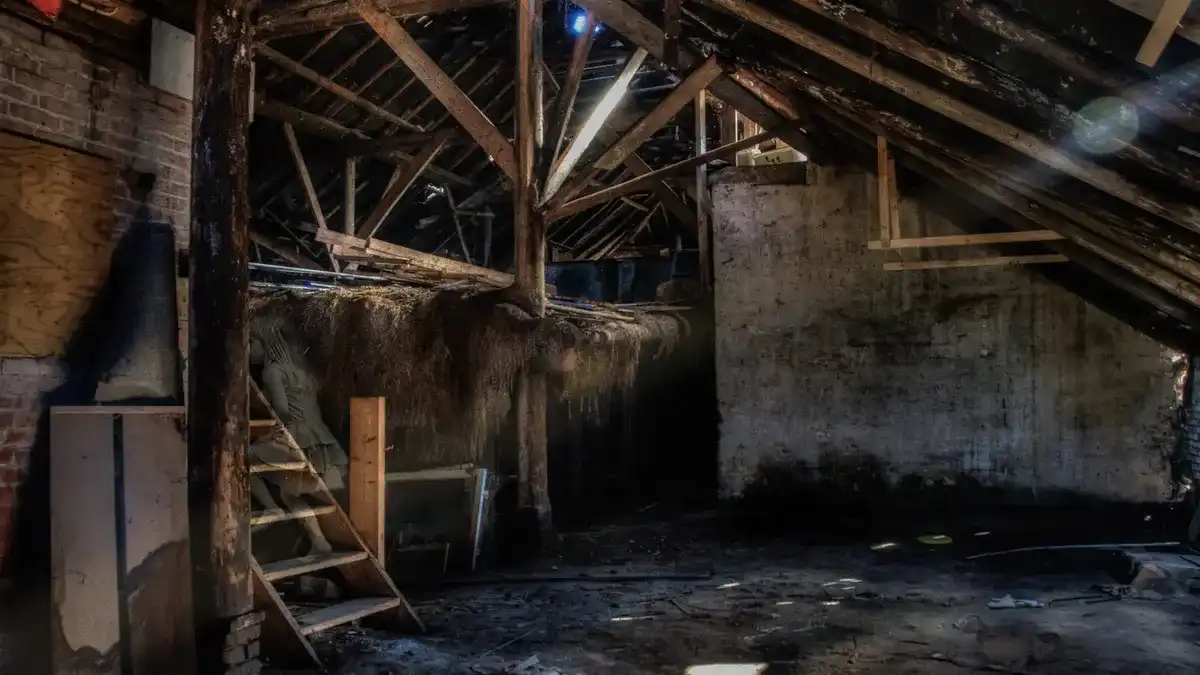
Picture this: you’re in the loft with a torch, looking at a beam that looks dark at one end and bowed in the middle. You need to know if that’s moisture damage, insect attack, or a structural warning before the next storm.
Timber pathology is the study of what harms wood—fungi, insects, wetting, drying, and mechanical damage. Structural roof diagnostics is the process of checking whether rafters, purlins, trusses, ridge members, fixings, and supports are still carrying load as intended. The two jobs are different, but they overlap in the same roof space.
A timber can look sound and still be weak. It can also look ugly and still be structurally fine. That’s the catch.
- Pathology asks: What changed the wood?
- Diagnostics asks: What is the roof doing now?
- Both ask: Is the damage local or part of a wider failure?
The best starting point is usually simple: trace the moisture source, then check whether the timber section has lost enough material or stiffness to matter. The Building Research Establishment and timber design practice both treat moisture as the driver of most biological decay, because fungi need sustained damp conditions to grow. If the timber stays dry, most decay stops. When in doubt, consult a qualified building professional or timber specialist.
See also: the UK Forestry Commission guidance on wood decay fungi and the Timber Research and Development Association guidance on structural timber inspection. See also roof maintenance guidance, timber decay inspection, and structural roof survey.
How do I tell timber decay from structural movement?
Timber decay usually shows texture change; structural movement usually shows geometry change. If the wood is crumbly, fibrous, soft, or spongy, think pathology first. If the roofline is bowed, kicked, spread, or cracked at joints, think load path first.
Picture this: you notice a stain around a ceiling patch, then see a rafter that has a gentle curve. You need to separate the mark on the surface from the force acting through the frame.
The clue is often in the combination of signs. A brown stain alone may mean a past leak. A crack alone may be old shrinkage. A stain plus soft wood plus a sagging ridge is a different story.
| Sign | More likely cause | What it means |
|---|---|---|
| Dark staining, no softness | Past water ingress | Check if the leak is active |
| Soft, friable timber | Fungal decay | Section loss may be real |
| Small pinholes with dust | Insect activity | Confirm species and extent |
| Sloping ridge line | Structural movement | Check supports and span |
| Split at a joint | Overstress or shrinkage | Check fixings and load path |
| Localized deflection | Load or damaged member | Measure against adjacent rafters |
A useful rule is this: decay changes the material; movement changes the shape. The two often arrive together when a leak has been active for months or years. That’s why a roof inspection should never stop at the first wet patch.
Here’s the catch: wood can decay from the inside out. A surface that feels firm may still hide a hollow core. Probing with a screwdriver helps, but it does not replace a proper assessment of member size, span, and support.
What causes timber pathology in roofs?
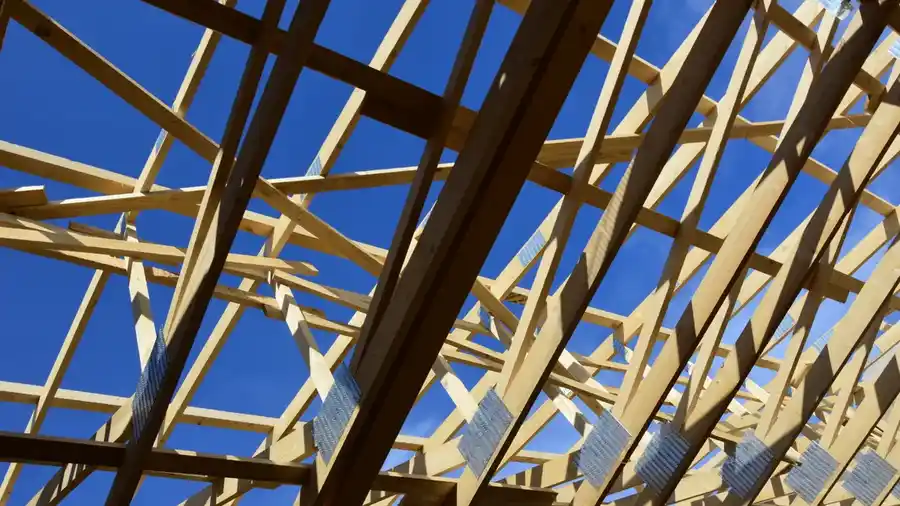
Timber pathology in roofs is usually caused by water, not age alone. Fungal decay needs moisture, oxygen, and a food source; insects often follow damp conditions or already weakened timber. The practical point is simple: one wet leak can create more damage than many dry years.
Picture this: you’re opening a loft hatch after a wet winter and smell a stale, musty odor before you even look up. That smell matters. It often points to trapped moisture, which is the root condition for many timber problems.
The most common drivers are boringly practical:
- roof leaks from damaged tiles, flashings, valleys, or membranes
- blocked gutters and downpipes causing backflow
- poor loft ventilation trapping humid air
- condensation around cold members
- old plumbing leaks in roof spaces
- failed pointing or chimney details
- repeated wetting after storms
Fungal decay is not all the same. Brown rot can make wood shrink, crack, and break into cubes. White rot attacks lignin and can leave a fibrous feel. Soft rot usually shows up in damp, exposed areas and tends to be slower. The exact species matters less than the moisture pattern that feeds it.
Insect damage can confuse the picture. Wood-boring beetles often leave flight holes and fine frass, but some holes are old and inactive. The presence of holes alone does not mean the member is failing today. What matters is whether the timber has lost section, stiffness, or bearing.
A qualified inspection looks for:
- moisture staining and active damp
- fungal fruiting bodies or mycelium
- softening at ends, joints, and bearing points
- hidden decay under roof coverings or behind insulation
- insect holes, dust, and exit evidence
- distortion at connection points
When the signs are mixed, consult a qualified inspector or structural engineer before drawing conclusions. The truth is, you do not diagnose a roof by eye alone. You diagnose it by matching the damage pattern to the moisture source and the load path. For general inspection principles, see timber inspection checklist, roof leak causes, and loft ventilation guide.
What does a structural roof diagnostic check include?
A structural roof diagnostic check includes geometry, support, connections, timber condition, and signs of overload. The aim is to decide whether the roof is simply imperfect or whether it is losing capacity.
Picture this: you’re in the loft with a tape, a torch, and a notepad, and the ridge line looks a little wavy. You need a method, not a guess.
A proper diagnostic sequence usually covers:
-
Roof form and load path
Identify whether the roof is cut, trussed, purlin-supported, or a hybrid system. A roof only works if loads travel from covering to rafters or trusses, then into walls or supports. -
Member size and spacing
Check the timber dimensions, spacing, and span. A member with enough depth and support behaves very differently from one that is undersized or over-spanned. -
Deflection and distortion
Look for sagging, twisting, lateral buckling, spread at the eaves, and cracked plaster below. The roof may still stand, but its movement is telling you something. -
Connections
Inspect nails, straps, bolts, hangers, and bearings. Many roof problems start at joints, not in the middle of the timber. -
Moisture and decay
Find the source of dampness. A dry beam with an old stain may only need monitoring; a wet beam with active decay needs a different response. -
Adjacent structure
Check masonry supports, ceiling ties, bracing, and wall heads. The roof can be blamed for a problem caused by settlement below it.
A visual inspection is only the first pass. If the roof is visibly distorted or the timber feels compromised, the next stage often needs a structural engineer or a timber specialist to assess remaining capacity. That is especially true when spans are long, alterations have been made, or the roof has old repairs of unknown quality. For deeper reading, see structural engineer roof assessment and roof movement signs.
One good rule is this: if the timber’s condition and the roof’s shape both look wrong, consult a professional and treat the situation as structural until shown otherwise.
Which signs mean the roof needs urgent attention?
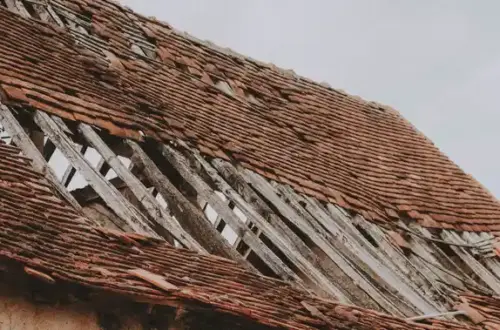
A roof needs urgent attention when the damage suggests active failure, not just old wear. Sudden sagging, cracking at supports, or widespread wet decay should move the roof to the front of the queue.
Picture this: a ceiling line has dropped a little overnight after heavy rain, or a beam end sounds hollow when tapped. That’s not a “watch and wait” moment. That’s a “check now” moment.
The strongest warning signs are:
- visible increase in sagging or spread
- cracks at wall plates, ridge supports, or truss joints
- timber that can be penetrated deeply with light pressure
- water dripping, active leaks, or repeated wetting
- fungal growth on timber surfaces
- broken or slipped roof tiles with underlay damage
- failed strapping or missing fixings
- new creaks, pops, or movement during wind
A single crack is not always catastrophic. A crack plus load spread plus soft bearing ends is far more serious. The same goes for staining: a one-off leak is one thing; a damp patch that returns after every storm is another.
On the flip side, some signs are lower urgency but still need checking:
- old stains with dry timber
- minor surface checking from shrinkage
- isolated insect holes with no fresh dust
- small areas of local distortion with no growth
Don’t ignore them. Just don’t confuse them with an immediate structural warning.
If the roof supports a heavy covering, has been altered, or already shows section loss, a faster assessment is smarter than waiting for a bigger defect. Roof failure rarely starts as a clean break. It starts as a small weakness that grows. For related guidance, see heavy roof coverings and roof crack causes.
How should timber roof damage be inspected and documented?
Timber roof damage should be inspected in a fixed order and documented with location, size, condition, and likely cause. Good notes matter because roof defects are easy to misremember once you leave the loft.
Picture this: you return a week later and cannot tell whether the soft patch was at the ridge, the valley, or the lower purlin. That is how small problems turn into expensive confusion.
A practical inspection record should include:
- exact roof area or bay
- member type: rafter, purlin, truss chord, collar, brace, ridge support
- visible defect type
- length or area of affected timber
- moisture sign, if present
- whether the defect appears active or historical
- whether the roof shape is changing
- photos with scale reference
A moisture meter can help, but it is not magic. Different wood species, salts, and surface finishes can skew readings. Use it as part of the picture, not the whole diagnosis. A reading of 18% is not the same as 28%, but the number still needs context.
A useful checklist is:
- identify the damp source
- check for active fungus or insect evidence
- compare suspect timbers with nearby sound ones
- note any joint failure or bearing loss
- measure visible deflection against a straight line or known reference
- review whether previous repairs may have hidden the issue
Here’s the catch: documentation is not just paperwork. It helps decide whether the problem is local repair, broader strengthening, or urgent structural intervention. Without good notes, the same roof can be “fine” to one person and “serious” to another.
For standards-led inspection, professionals often refer to recognized timber design and decay guidance from bodies such as the British Standards Institution and the Forest Products Laboratory in the US. Their value is not a slogan; it is a shared method. See also building standards guidance and structural inspection report.
What repairs usually work, and what mistakes make things worse?
The right repair fixes the moisture source, restores capacity, and keeps the timber dry. The wrong repair hides decay, traps damp, or adds load to a weak roof.
Picture this: someone has boxed over a stained rafter with plasterboard and paint. The roof looks better for six months, then the sag comes back. Cosmetic repair without diagnosis is not repair.
The usual repair paths are:
- Fix the leak first. Replace damaged coverings, flashings, valley details, or failed membranes.
- Dry the roof space. Improve ventilation where the roof design allows it.
- Remove decayed timber only where needed. Local splice or replacement can work if bearing and load path remain sound.
- Reinforce carefully. Sistering or added members may be used when the original timber still contributes but needs help.
- Address the cause, not just the symptom. Otherwise the same decay returns.
Mistakes that make the roof worse include:
- covering wet timber with new finishes
- leaving the leak unresolved
- trapping insulation against damp timber
- adding heavy finishes without checking capacity
- cutting into members for services
- replacing partial sections without proper bearing or connection detail
A repair can fail even when the timber looks “better.” If the new piece is attached poorly, or if the old decay remains active nearby, the roof still has a weak point. Load follows the weakest path. See also roof repair mistakes and timber reinforcement methods.
The best part is that many roof problems are manageable when caught early. The worst cases are the ones where water has been active long enough to destroy the ends of members, the fixings, and the supports all at once.
What’s the verdict on timber pathology versus structural failure?
Choose timber pathology first if the main signs are damp, staining, softness, fungus, or insect evidence and the roof shape is still stable. Choose structural diagnostics first if the roof is sagging, spreading, cracking at joints, or showing movement under load. Neither if the timber is wet, the defect is widespread, and the source of moisture has not been found.
The truth is, the cleanest verdict comes from pairing the two views. Pathology tells you why the wood changed; diagnostics tells you whether the roof can still carry itself. If you separate them, you miss the real problem.
The condition that tips the scale is usually not one dramatic crack. It is the combination:
- a leak that has lasted through more than one wet season
- decay at ends, joints, or bearings
- visible deflection in the roof line
- failed fixing points
- evidence that repairs were only cosmetic
That combination deserves serious attention, because the roof is no longer just damaged. It may be losing capacity.
If the roof is dry, the shape is true, and the timber loss is minor, the problem is often local and repairable. If the roof is wet and moving, the issue is no longer just pathology. It is structural.
What are the exception scenarios that change the call?
The call changes when the roof has hidden weaknesses, altered loads, or a defect pattern that looks small but acts large. These cases deserve a different reading than the usual damp-and-sag rule.
Picture this: the roof looks ordinary from the loft hatch, but a previous conversion, solar fixings, or cut members changed the load path. That is where standard assumptions fail.
The main exceptions are:
-
Historic alterations
If cut trusses, removed collars, or added dormers changed the structure, even a small defect can have a larger effect than it would in an untouched roof. -
Long-term concealed leaks
A roof that has leaked behind insulation or under finishes may show little on the surface while hidden decay spreads through bearings and joint ends. -
Heavy covering changes
Slate, tile, or other cover changes can alter load enough to expose timber that was once adequate but is now overstressed. -
Localized high-value support points
A small defect at a ridge support, wall plate, or purlin bearing can matter more than a larger defect in a non-critical area.
In these cases, a surface inspection can understate the risk. That is why the exact location of the defect matters as much as the defect itself.
The practical lesson is plain: the same amount of rot does not mean the same level of danger everywhere in a roof.
FAQ: timber pathology and structural roof diagnostics
How can I tell if a roof leak has caused decay?
A roof leak has likely caused decay if the timber is soft, friable, or hollow near the wet area and the staining is paired with smell, fungus, or recurring damp. A dry stain alone does not prove decay. The key test is whether the timber has lost texture and section, not just color.
Is a sagging roof always a structural emergency?
A sagging roof is not always an emergency, but it is always a structural concern. If the sag is new, worsening, or paired with cracked joints, broken fixings, or soft timber, it needs prompt professional assessment. If it is old and unchanged, it still needs checking, just with less urgency.
Can rotten timber in a roof be repaired without replacing everything?
Yes, rotten timber can sometimes be repaired locally if the decay is limited and the remaining timber still carries load. The repair has to restore both strength and dryness, or the problem returns. If the bearing ends are badly affected or decay is widespread, partial repair may not be enough.
Do insect holes always mean the timber is unsafe?
No, insect holes do not always mean the timber is unsafe. Old, inactive holes can remain after the pest has gone, and some species leave more visible marks than structural damage. The real question is whether there is fresh activity, section loss, or weakness at a load-bearing point.
Should I inspect the roof after every storm?
Yes, a quick visual check after a storm is smart, especially if the roof already has age, prior leaks, or known weak points. Look for slipped tiles, fresh staining, new drips, and changes in shape. If anything changed, a fuller inspection is worth doing before the next wet spell.
Drafted with AI; not yet reviewed by a person.